Hey there! I'm a supplier of scraper buckets, and today I'm gonna walk you through the process of installing a scraper bucket. Whether you're a construction newbie or a seasoned pro looking to refresh your memory, this guide is for you.
Before You Start
First things first, safety should always be your top priority. Make sure you've got all the necessary safety gear, like hard hats, safety glasses, and steel - toe boots. You'll also want to gather the right tools for the job. Usually, you'll need a socket wrench set, a torque wrench, a pry bar, and a good pair of pliers.
It's important to check the scraper bucket thoroughly before installation. Look for any signs of damage, like cracks or bent parts. If you spot anything wrong, don't use it. Reach out to us, and we'll sort you out with a new one.
Choosing the Right Scraper Bucket
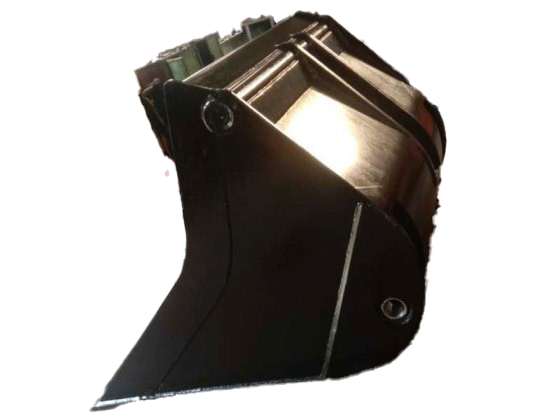
We offer a range of scraper buckets to suit different needs. If you're dealing with smaller projects, our 1 - cubic Meter Side Support Frame might be the perfect fit. It's lightweight and easy to handle. For medium - sized jobs, the 1.5 - cubic Meter Bucket provides a good balance between capacity and maneuverability. And if you've got large - scale projects, our 2.3 - cubic Meter Bucket is the way to go. It can hold a lot of material, which means fewer trips to dump the load.
Preparing the Machine
Before you start installing the scraper bucket, you need to prepare the machine it'll be attached to. This usually means a scraper or a similar heavy - duty vehicle. Park the machine on a flat, stable surface and turn off the engine. Apply the parking brake to make sure it doesn't move during the installation process.
Next, clean the attachment points on the machine. Remove any dirt, debris, or old grease. This will ensure a good connection between the machine and the scraper bucket. You can use a wire brush or a pressure washer to get the job done.
Installing the Scraper Bucket
Step 1: Positioning the Bucket
Carefully position the scraper bucket near the attachment points on the machine. Make sure it's aligned correctly. You might need a friend or a coworker to help you with this step, especially if the bucket is large.
Step 2: Connecting the Hydraulic Hoses
Most scraper buckets are hydraulically operated. So, you'll need to connect the hydraulic hoses from the machine to the bucket. Start by identifying the correct hoses. They're usually color - coded for easy identification. Use the pliers to loosen the hose fittings and connect them to the corresponding ports on the bucket. Make sure the connections are tight to prevent any hydraulic fluid leaks.
Step 3: Attaching the Bucket to the Machine
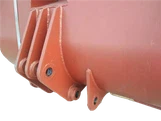
Once the hydraulic hoses are connected, it's time to attach the bucket to the machine. Line up the mounting holes on the bucket with the holes on the machine's attachment points. Insert the pins through the holes. You might need to use a pry bar to get the pins in place if they're a bit stubborn.
Step 4: Securing the Pins
After inserting the pins, secure them with the appropriate retaining clips or cotter pins. This will prevent the pins from coming out during operation. Double - check that all the pins are properly secured.
Step 5: Torqueing the Bolts
Some scraper buckets also require bolts to be tightened. Use the torque wrench to tighten the bolts to the manufacturer's recommended torque settings. This is important to ensure the bucket is firmly attached to the machine and to prevent any loosening during operation.
Testing the Installation
Once the scraper bucket is installed, it's time to test it. Start the machine's engine and operate the hydraulic controls to move the bucket up and down, and side to side. Check for any unusual noises, vibrations, or leaks. Make sure the bucket moves smoothly and that all the functions are working properly.
If you notice any problems during the test, stop the machine immediately and double - check the installation. Look for loose connections, misaligned parts, or any other issues. Fix them before using the scraper bucket on a job site.

Maintenance Tips
To keep your scraper bucket in good condition, regular maintenance is essential. After each use, clean the bucket thoroughly to remove any dirt, debris, or material buildup. Check the hydraulic hoses for any signs of wear or damage. Replace them if necessary.
Inspect the pins, bolts, and retaining clips regularly. Tighten any loose bolts and replace any worn - out pins or clips. Lubricate the moving parts to ensure smooth operation.
Why Choose Our Scraper Buckets
Our scraper buckets are made from high - quality materials, which means they're durable and long - lasting. We've got a team of experts who design and manufacture these buckets to meet the highest industry standards. Whether you need a small bucket for a simple job or a large one for a big project, we've got you covered.
If you're interested in purchasing a scraper bucket or have any questions about the installation process, don't hesitate to get in touch. We're here to help you find the right solution for your needs.
In conclusion, installing a scraper bucket might seem like a daunting task, but if you follow these steps and take the necessary precautions, it can be a straightforward process. And with our top - quality scraper buckets, you'll be well - equipped to tackle any construction project.
References
- Construction Equipment Maintenance Manuals
- Scraper Bucket Manufacturer's Installation Guides